
This guide is specifically designed for those who are interested in participating in the AnimeCoin revolution but have zero experience with Crypto. In five easy steps, this guide will show you have to buy AnimeCoin from Cryptopia, currently the only exchange that offers AnimeCoin.
The steps are pretty simple:
- Buy Bitcoin
- Join Cryptopia
- Transfer Bitcoin to Cryptopia
- Find ANI on Cryptopia
- Buy it!
The guide below outlines the easy to follow steps to submit your first AnimeCoin order!
Step 1: Get Bitcoin
If you already own Bitcoin you can skip this step!
You can’t buy AnimeCoin with a credit card, most of the crypto exchanges work by using BTC (Bitcoin) or ETH (Etherium) as a base unit for exchanging coins so this means you need to first obtain BTC in order to get AnimeCoin.
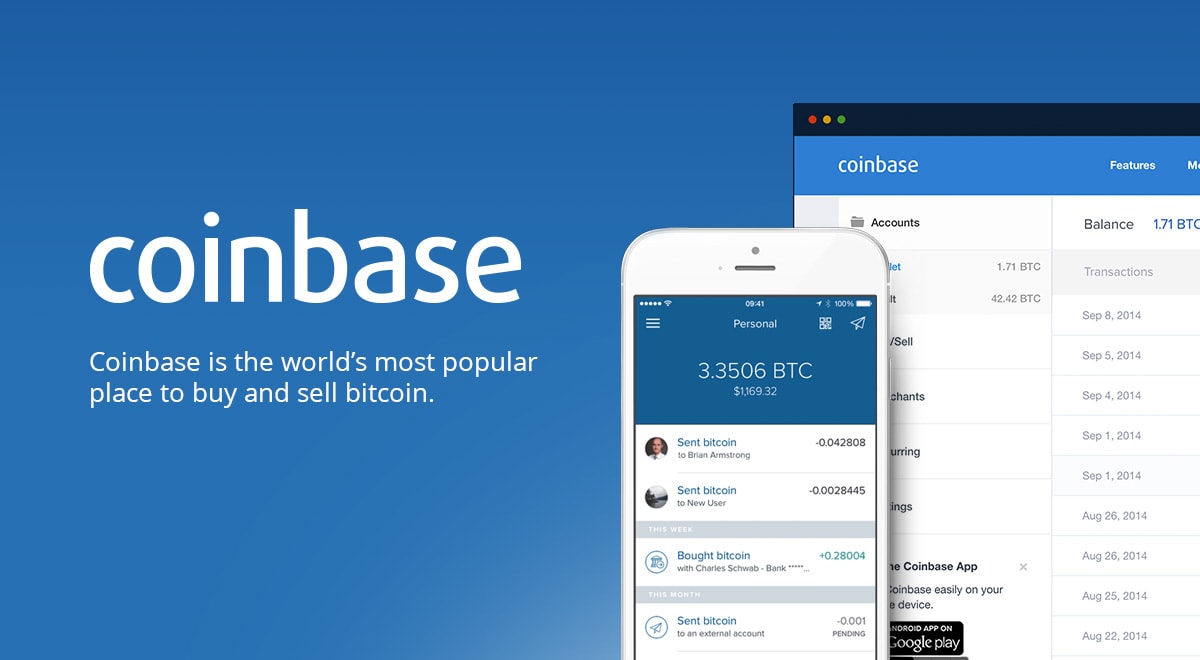
Luckily, if you are a US citizen or in most western countries, you can easily sign up for CoinBase, Shapeshift, or Bitstamp account and purchase your first BTC using a credit card or bank transfer. These are some of the most trusted Fiat to Crypto exchange platforms in the world and are a great place to start your crypto journey.
Because you are interacting with fiat, these exchanges may require you to verify your identity or fill out tax information. The process shouldn’t take long to complete.
Once you have verified your identity and linked your bank account or credit card, it’s time to buy BTC! Contrary to popular belief, you don’t have to buy one whole bitcoin in order to start trading! For some people, $9,800 for a single bitcoin is too much!
Luckily, you can buy any amount you need of BTC like $100 worth and you can still transfer that amount and use it for exchange purposes!
Step 2: Get a Cryptopia Account
Cryptopia is currently the only exchange that has AnimeCoin listed so this is the only exchange you will need to sign up for in order to get your AnimeCoins. Unlike the previous exchanges, you won’t have to go through so much paperwork or identity verification since you will now be dealing directly with BTC > ANI.
Once you have successfully created your account on Cryptopia, you’re ready for the next step!
Step 3: Transfer BTC to Cryptopia
For most people, this step will be the most difficult but if you follow these instructions properly it will soon become pretty simple!
Overview: Basically what we will be doing is transferring BTC from your Coinbase account over to Cryptopia. To do this, you will need to “Withdraw” BTC from Coinbase and “Deposit” it into Cryptopia. You will need to copy / paste your Cryptopia BTC wallet address into the Coinbase Deposit location.

ON COINBASE: Go to the “Accounts Tab” and locate your BTC balance. Beneath the Bitcoin logo you should see a paper airplane icon and a “Send” button.

Press this “Send” button and a form should come up asking for the BTC address you will be sending your Bitcoin to.
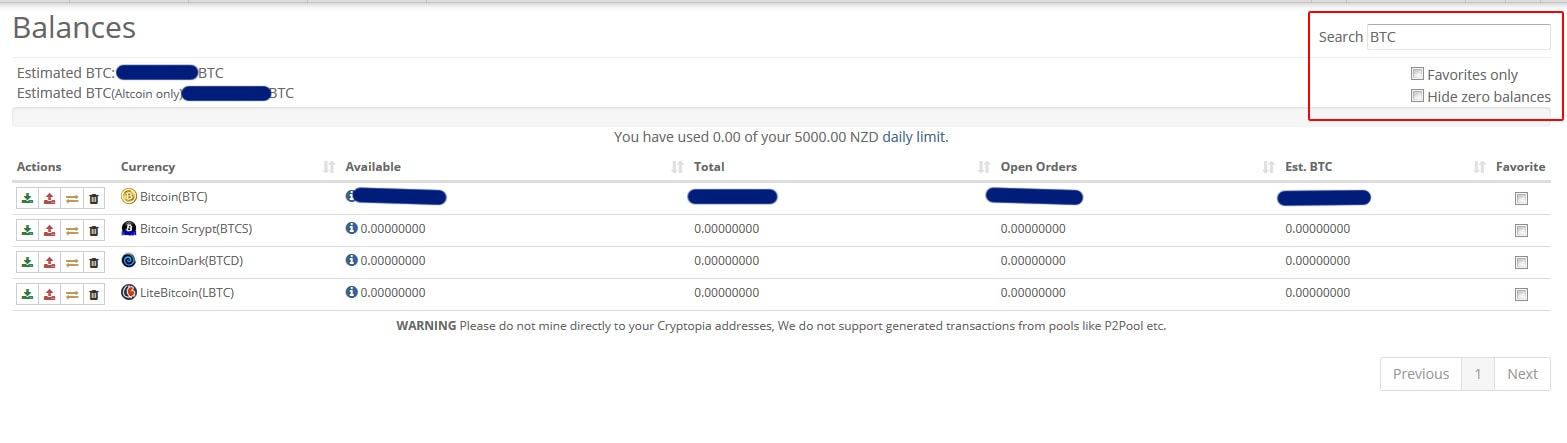
ON CRYPTOPIA: Look for the Bitcoin logo in the top navigation and click on the submenu item “Balances.”

On this screen you should see all your balances. At this point, we are assuming that you have zero BTC on Cryptopia, if this is the case you need to simply search “BTC” in the search bar. Make sure that “Hide Zero Balances” is unchecked.
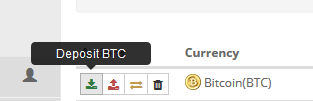
Once you are able to locate the Bitcoin (BTC) item on Cryptopia, click on the green Deposit icon (see image below).
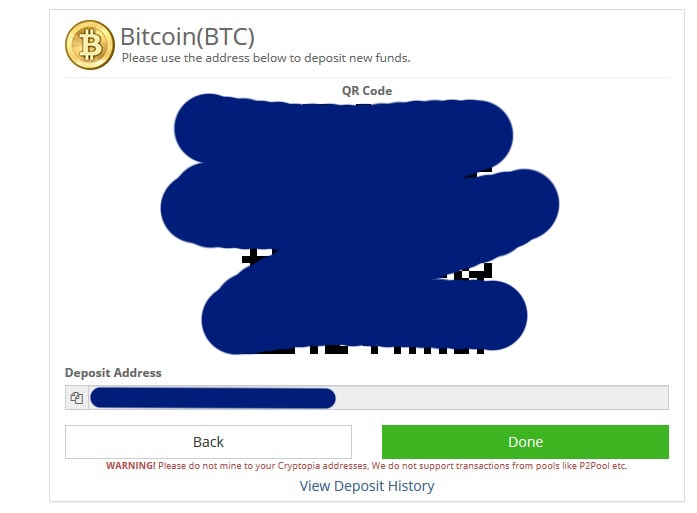
A pop up should appear with a QR Code and the Deposit address below the code. Copy the Deposit Address.
BACK TO COINBASE: Paste the deposit address into the Send form. Confirm the amount you want to send, and click send. You may also need to confirm this send transaction via email or SMS.
*Please note that BTC transfers usually take 5 – 3o minutes to complete, so do not be alarmed if you do not see your BTC balance on Cryptopia for a few minutes.
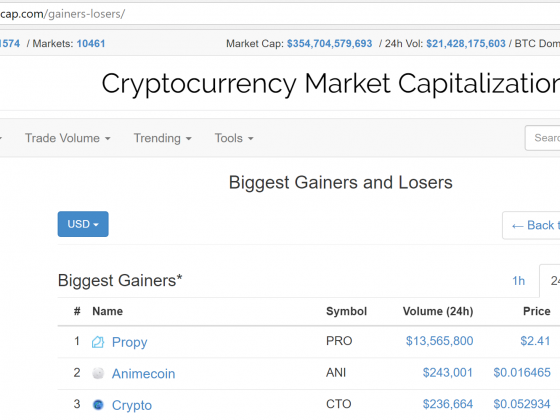
Step 4: Search “ANI” on Cryptopia
Once you have received your BTC on Cryptopia, you are finally ready to buy some AnimeCoins!
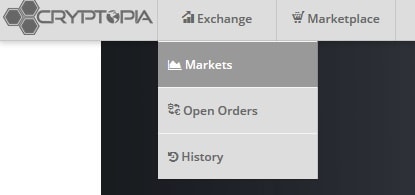
In the top navigation bar, under “Exchange” you should see a sub-menu item called “Markets,” click on that button to load the exchange markets view.
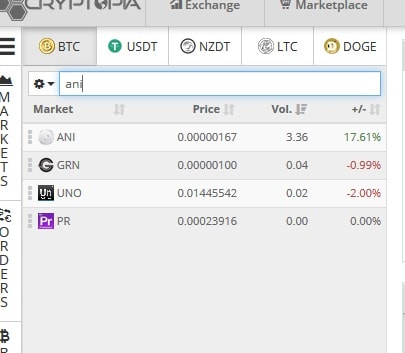
On this page, in the top search bar, type in “ani” and the AnimeCoin listing should be the first item to appear (noted with the silver coin icon and the ticker ANI).
Click on this item and you should now be presented to the AnimeCoin trade page. Alternatively, you can also click HERE and this should take you to the AnimeCoin trade page.
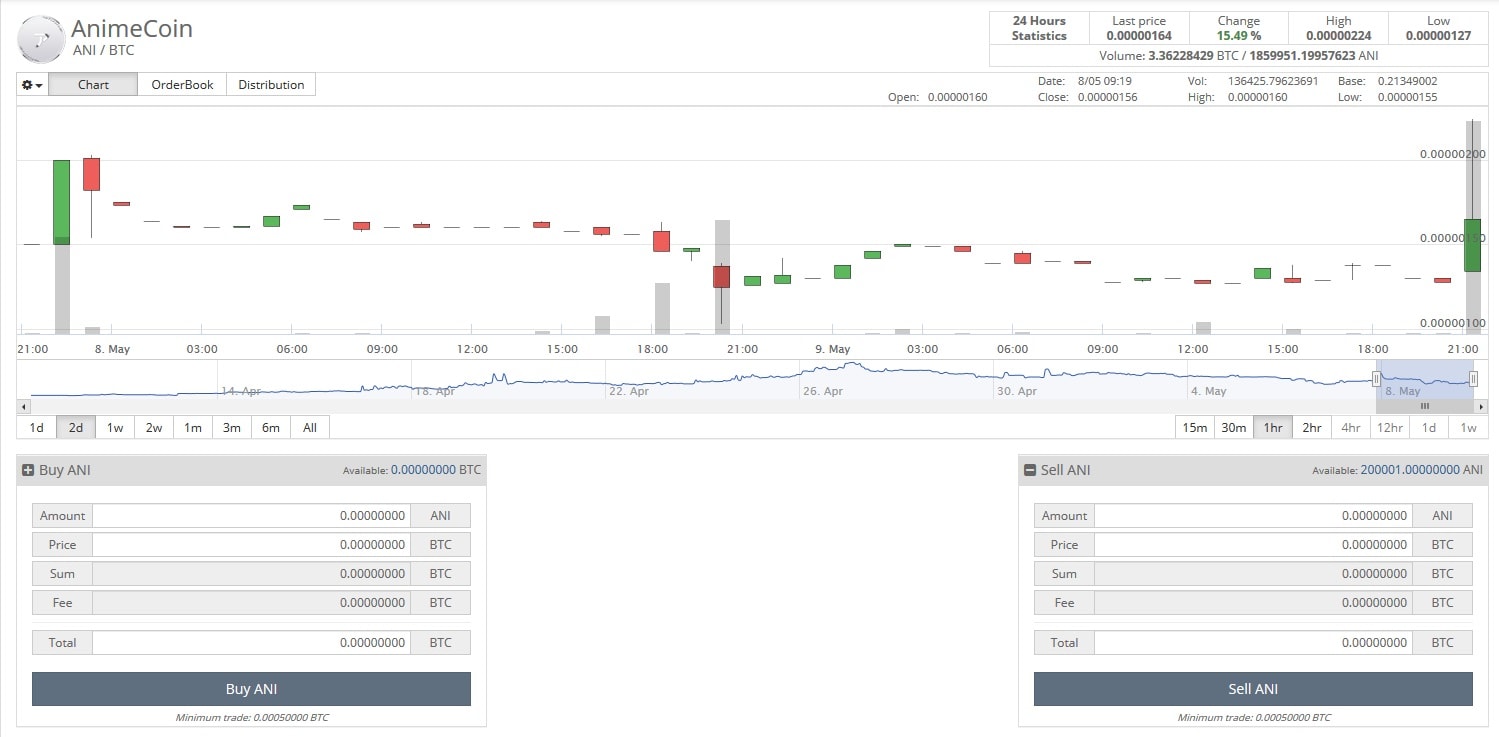
The trade page should look something like this.
Step 5: Buy ANI
On the ANI trade view page you should see two boxes below the graphs, one says “BUY ANI” the other says “SELL ANI.” The guide below explains what each item in this box represents.
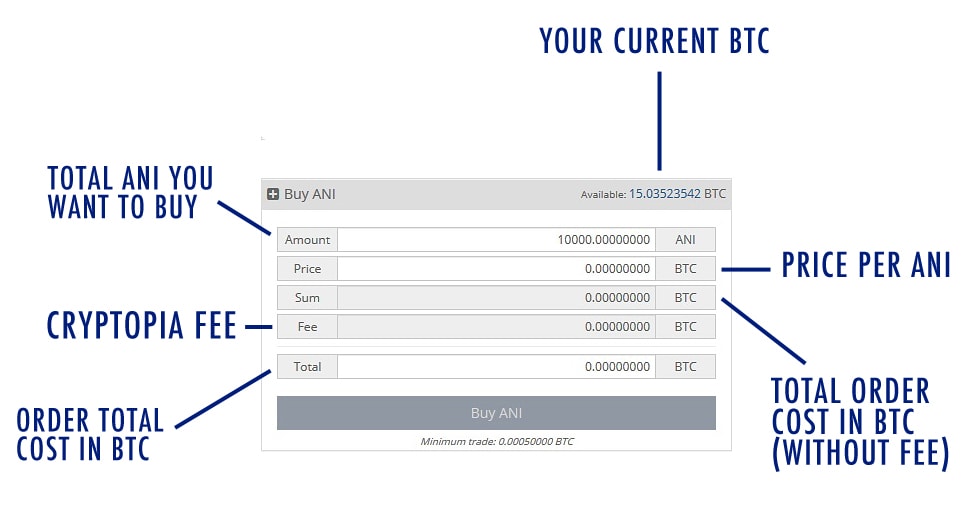
In order to buy, you will need to manually type in the amount of ANI you want to buy, in this example we are typing in 10,000 into the top box labeled “amount.”
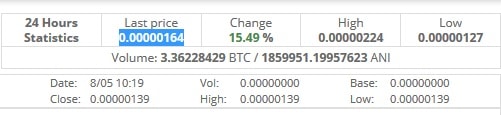
Price is the price you are proposing to buy ANI for. This is something you will need to input as well, and you can just copy / paste the “last price” from the top of the trade view page.
The reason you have to input the last price manually is because you can also put in orders for a lower price, and if the price ever drops to your proposed buy order, you can complete the order at a lower price. However, there is no telling whether the price will ever drop to the point you want, and you may end up waiting a long time before you ever get your ANI. In this example, we use the “last price” so we can submit and order and receive our coins quickly!
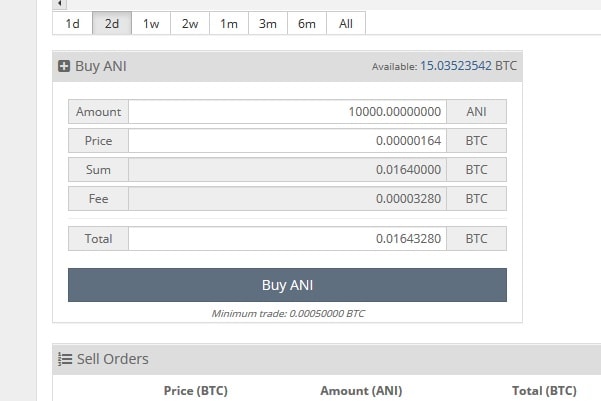
After you paste in the price, the rest of the items should automatically populate. Assuming you have enough BTC to make the purchase, you can click the “Buy ANI” button at the bottom and complete your order!